Showing posts with label Desserts. Show all posts

Sunday, January 15, 2012

Peanut Butter Granola Clusters

I can't take any credit for this recipe, but it makes a hearty, tasty, relatively-good-for-you treat, and I wanted to pass it along! I found this recipe in the Relish magazine insert that comes in my weekly newspaper. You can find the recipe on their website using this link:

Peanut Butter Granola Clusters Recipe

I used honey rather than brown rice syrup, and I was short on dried cranberries so I just added in some raisins to make up the difference. As long as your oats are certified GF, there shouldn't be any  substitutions needed.


These clusters do get pretty crispy, and they are a little on the fragile side while they are cooling. Let them cool almost all the way before removing from the parchment paper. Because of the protein in the peanut butter and the hearty oats mixed in, these clusters stuck with me for quite a while. Hope you enjoy these as much as we did at my house!

Friday, December 30, 2011

A perfect way to close out the year: So many firsts!

I didn't intend to spend so much time away from my blog. The holidays are a time of confusion, worry and fear for newly diagnosed gluten intolerant folks, and so I had intended to share my favorite holiday recipes with you. And, then I had a family emergency.

My grandpa was not well, and we rushed to be at his bedside. Unfortunately, we got stuck in the first (and practically only) snow to track through the central United States. We did not make it in time to be with him, but we made it in time to support my family and to lean on them as we all grieved. After that, I've been in a funk. I haven't been able to get myself into the mood for much of anything. Christmas was something we tried to muddle through even though we never really felt like buying gifts or doing anything festive.

But we did it.

We got our annual Christmas letter out on-time, albeit very pared down from previous years. I think pretty much everyone got a gift from us. I'm behind on my thank-you notes, but I've done what I could to this point. The last item on my holiday checklist is my Three Kings Cake. I make one every January 6, hide a baby Jesus in it, and we make a game out of seeing who can find the hidden baby in a slice of cake. I have made a different style of King Cake every year, and I was searching through some of my favorite blogs to see what I could make this year.

One of my favorite bloggers is Gluten Free Girl, but she has started making all of her recipes by weight, which left me only able to enjoy her recipes visually. I felt unable to bake by weight, but her writing and culinary creations still inspired me.  As curious happenstance would have it, my dear best friend bought me a kitchen scale for Christmas. Only a week later I happened upon this gem of a recipe for Cardamom Fruit Bread on Gluten Free Girl's blog. I decided this bread would be a perfect challenge for me. My Grandpa had an uneaten fruitcake in his refrigerator before he went into the hospital. For whatever reason, I could not stop thinking about that fruitcake. I had never had fruitcake before, and had never really thought of trying it. I believed Johnny Carson that only one fruitcake was in existence and was re-gifted throughout history. But, there had been one in Grandpa's refrigerator, and this fruit bread on GFG's website looked like something I wanted to try. Besides, I had a kitchen scale now and had no excuse not to make it.

The only things I didn't have on hand were candied fruit and cardamom. Cardamom was easy to get, but I could not find any candied fruit without high fructose corn syrup. So, I bought golden raisins, dark raisins, chopped dates, green and red maraschino cherries (Yeah, I know, not healthy at all), and an orange. I chopped the cherries and the orange zest and then followed this recipe for candying fruits. Super simple! You should give it a try! I blanched the orange peel twice and then followed the syrup recipe. Once I made the simple syrup, I poured in some rum and then brought all of the dried fruit and orange peel to a simmer for 30 minutes.

I didn't have a bundt cake pan, but I did have an angel food cake pan. The end result was beautiful!


Lots of color throughout. My favorite part was the candied orange zest. Yum!


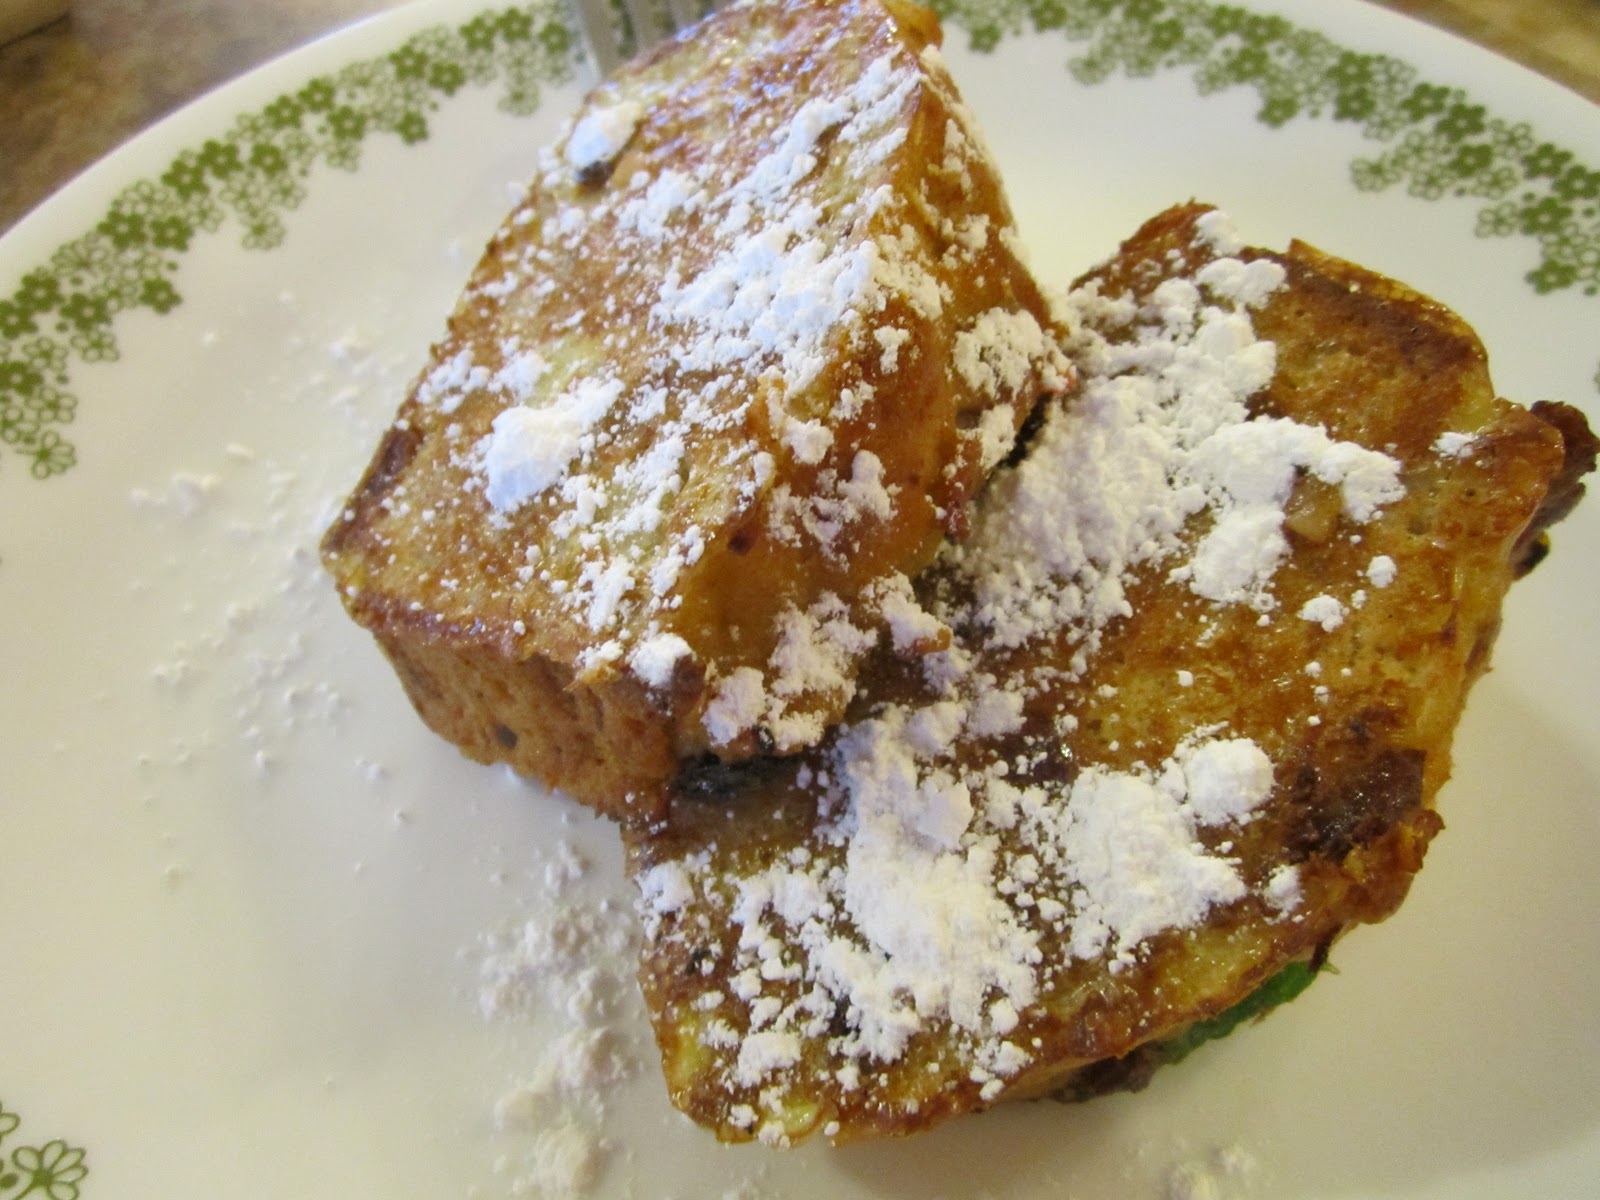
We worked on the bread for a couple of days, and then I decided to make french toast with the rest of it. I sliced up the leftover bread and used my recipe for Almond French Toast. I topped mine with a sprinkle of powdered sugar.


And so, my hope for you is that your new year will be filled with newness. Try a new recipe. Bake by weight, if the fancy strikes you. Go out and accomplish that goal you've always dreamed of but were too afraid to try. Candy some fruit. It really isn't that hard. Whatever it is that you do, do it to the best of your ability. But, above all else - love. Have a very happy, love-filled (and fruit-bread-filled) new year!


Tuesday, November 8, 2011

Orange-Coffee Cake with Orange-Coffee Glaze

I love cooking and baking. I think that probably goes without saying! But one thing I had never tried to do (because it terrified me to think about!) was make a cake without a recipe. Cake just seems so finicky. Cupcakes are pretty forgiving, especially if you use muffin papers, but cake just seems like a different  animal altogether...or a different food altogether. Whatever.

Anyway, a couple months ago I got this strange idea in my mind of making a cake using coffee and orange juice. I have no idea where the idea even came from. But, once the idea was in my mind I had to make it even though I was terrified to make a cake without a recipe to guide me.

I am SO glad I followed my craving. This has become a favorite recipe for me, and it even makes wonderful cupcakes. My husband almost always has a pot of coffee on, so I steal just over a 1/4 cup from the pot and he can have the rest. Win-win.
***Orange-Coffee Cake with Orange-Coffee Glaze
1 cup white rice flour
1/4 cup brown rice flour
3/4 cup sugar
dash salt
3/4 tsp. baking powder
1/2 tsp. cinnamon
1/4 tsp. ground cloves
1/4 tsp. ground allspice
1/4 cup butter
1/4 cup milk + 1/4 tsp. vinegar
1/2 cup applesauce
1/4 cup brewed coffee
1/4 cup orange juice (no pulp is best)
2 eggs

Orange-Coffee Glaze
3/4 cup powdered sugar
2 Tbsp. butter, softened
1 1/2 tsp. brewed coffee
2 Tbsp. orange juice (again, no pulp)

Preheat oven to 350 degrees. Grease 8x8 baking dish.

In large bowl, combine flours, sugar, soda, salt, cinnamon, cloves, and allspice. Mix thoroughly. In 1/4 cup measuring cup, put 1/4 tsp. white vinegar and fill the rest of the way with milk. Let stand 5 minutes to create buttermilk. Add buttermilk mixture, butter and applesauce to dry ingredients. Pour hot coffee over butter to soften it. Add in orange juice and eggs. Mix until batter is smooth. Pour cake batter into prepared 8x8 baking dish. Bake for 30-35 minutes, or until cake springs back when lightly pressed.
Let cake stand for 15-20 minutes. In small bowl, combine softened butter, coffee and orange juice with powdered sugar. Mix until smooth. If making recipe as a cake, pour entire amount of glaze over the top, spreading to coat evenly. Glaze will look like this at first. It will continue soaking into the cake.


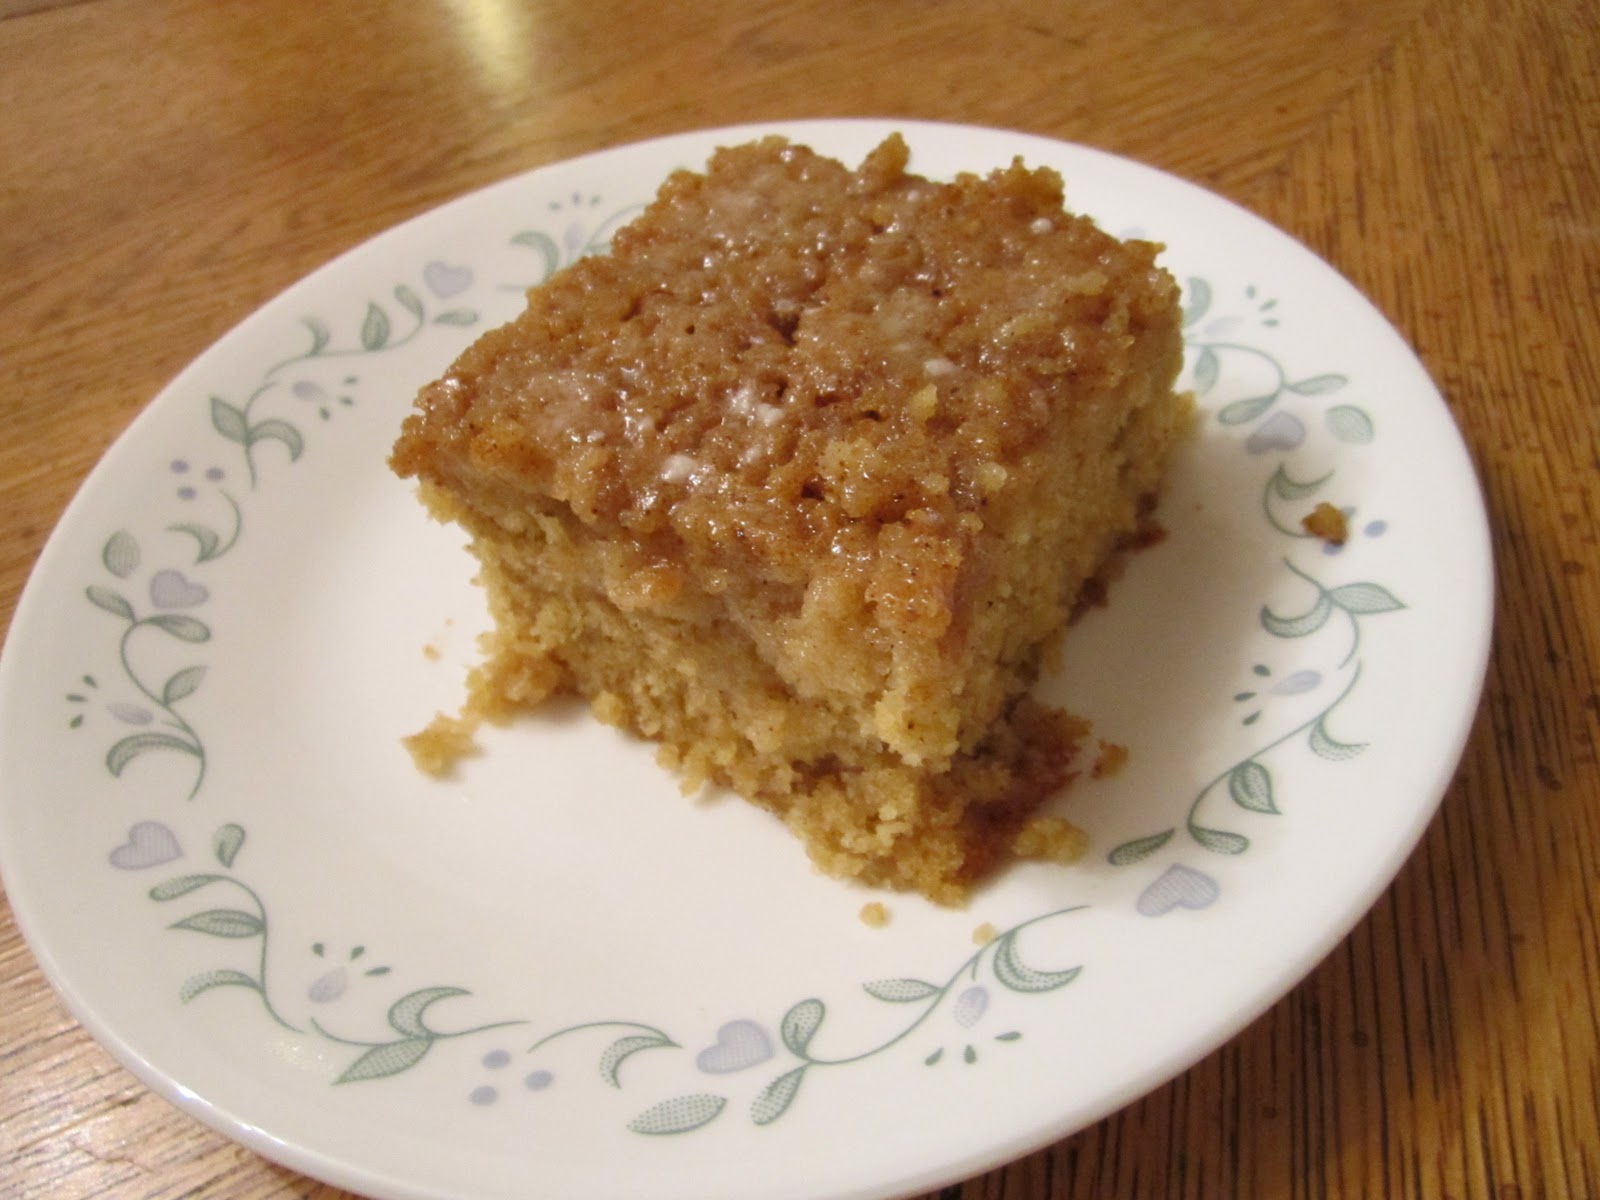
Let the cake mostly cool before serving. When the glaze has soaked in, it will look like this. It creates a wonderful layer right at the top of the cake. Oh yum. Drooling just thinking about it!


This recipe will make about 12 cupcakes/muffins if you decide to do it that way. I've served the cupcakes with or without the glaze.

I hope you will enjoy this recipe as much I have. And, don't be afraid to try and make your own cake when the desire strikes. Perhaps you will create a favorite too!

Saturday, October 15, 2011

Digging for Bones Snack Cups

Perhaps you have a child that is a dinosaur lover and dreams of being a paleontologist. Or maybe you are hoping to make a gluten-free Halloween treat that everyone will love. Either way, this recipe will be a hit at your house - and with anyone who gets to try one of these snack cups!

The most time consuming part of the process is baking time for the little meringue "bones." They bake for about an hour and half at a low oven temperature, but I figure that gives me quite a bit of time to clean up the kitchen, or do something fun with the kids while waiting.

First, you mix up all the ingredients for the meringue bones, scoop the mixture into a large ziploc bag and snip off one corner. Pipe some bone shapes onto two cookie sheets that are covered with parchment paper. Bake for about 1.5 hours. When they are done, they will no longer be squishy to the touch and they will have begun browning slightly. They will look kinda like these: (Yeah, I know they don't look anything like actual bones!)


Allow the "bones" to cool, and then break each "bone" into 2-3 pieces. Crush up Honey Nut Chex (I used most of the box). In small, clear cups layer crushed cereal, chocolate chips (or desired GF chocolatey candy), and "bones." Repeat layers one more time. This should make about 10 small snack cups.


***Digging for Bones Snack Cups
3 egg whites
1/4 tsp. cream of tartar
1/2 cup sugar
Pinch of salt
Honey Nut Chex cereal
Chocolate chips (or other desired GF chocolate candies)

Supplies: parchment paper, ziploc bag, clean scissors, small plastic cups (I like clear best)

Cover two cookie sheets with parchment paper. Heat oven to 225 degrees. In large bowl, beat egg whites with electric mixer on high until foamy. Add in cream of tartar and salt. Continue beating until the egg mixture forms small peaks that are not dry. Add sugar and beat until the mixture appears shiny. Spoon beaten egg mixture into large ziploc bag. Seal ziploc bag and snip one corner with scissors. Pipe bone shapes onto prepared baking sheets. Bake "bones" for 1.5 hours, and rotate baking sheets halfway through bake time. "Bones" are done when they are no longer soft to the touch and have begun to brown. Cool completely. Break each "bone" into 2-3 pieces.

Crush Honey Nut Chex. (I used almost a whole box) In small, clear plastic cups, layer crushed cereal, chocolate chips, and "bones." Repeat layers. Makes about 10 snack cups.

My kids had lots of fun with these cups. My oldest pretended he was digging for dinosaur bones and we had to identify what kind of dinosaur each bone came from. Hope you enjoy!

Saturday, September 3, 2011

Chocolate Cherry Oat Bars

There isn't much I can say about these bars except YUM! I bought a carton of cherries at the grocery store, but by the time I went to use them, most of them were soggy and not very good anymore. So, I wanted to find a use for the few cherries I had left. These bars were perfect! The cherries are only on the bottom layer, and they are like a little treat in each bite.


***Chocolate Cherry Oat Bars
1/2 cup brown rice flour
1/2 cup pitted, diced cherries
1/4 (or less) sugar for sprinkling over cherries
1/2 cup sugar, for chocolate-oat batter
1/2 cup GF oats
1/3 cup oil, plus 1 1/2 Tbsp.
2 Tbsp. cocoa powder
1 egg
1 1/2 Tbsp. water
1 tsp. baking powder

Preheat oven to 350. Grease 8x8 baking dish. Cover bottom of baking dish with diced cherries. Sprinkle cherries with desire amount of sugar. In bowl, mix brown rice flour, 1/2 cup sugar, oats, cocoa powder, and baking powder, until combined. Slowly mix in oil, water and egg. Batter will be thick. Spoon chocolate-oat batter over cherries, using spoon to spread mixture evenly over cherries. Bake for 25-30 minutes, or until toothpick inserted into center comes out clean.

Bars are best after they have cooled down most or all of they way. They are a little crumbly, but I like it that way and didn't really want to add xanthan gum. If you'd like to make it stick together more, I'm sure you could add 1/2 tsp. xanthan gum.

Thursday, August 25, 2011

Gluten-Free Angel Food Cake

Oh. My. Goodness. This cake is perfection! I confess that even before I stopped eating gluten I had never made an angel food cake. I'm not sure why I didn't. Several people in my family have angel food cake as their favorite cakes, and I enjoy eating it too. For some reason, it never occurred to me to try and make it myself.

Shortly after starting my blog, I had a request for a gluten-free angel food cake recipe that tasted like the real deal. I *love* being asked to help others create recipes, and so, I decided to give it a shot! I fully expected my first attempt to be a flop, especially after reading stories others had written about cakes that flopped. So, I was nervous, but very excited to try.

One of the keys to a fluffy angel food cake that doesn't fall in is inverting the cake after it bakes. Many angel food cake pans are being made with "feet" on the bottom to help with this. For those that don't have the little feet, you can turn the pan over the top of a bottle. Or...if you get a highly dysfunctional pan like mine that is too small for any bottle tops and doesn't have any feet, you can turn it over on a cooling rack or over three coffee cups spread around the edges of the pan.

Many recipes use a stand mixer, but I don't have one. So, I beat the eggs with an electric hand mixer and it worked out perfectly fine. Also, I'm too lazy for sifting. So, I "sifted" my flours and sugar with a fork.

And so, here it is!

***Gluten-Free Angel Food Cake
1 1/2 cup egg whites (using between 10-12 eggs), brought to room temperature
1/2 cup white rice flour
1/4 cup brown rice flour
1/4 cup corn starch
2 Tbsp. tapioca starch/flour
1 1/4 cup sugar for mixing with flour, 1/4 cup sugar for mixing with eggs
2 tsp. vanilla extract
1 tsp. cream of tartar
Pinch of salt

Move oven rack to lowest position. Preheat oven to 350. Separate 10-12 eggs, until you have about 1 1/2 cups of egg whites. (If you hate the thought of wasting 12 egg yolks, check out this link for methods on freezing egg yolks. I froze three packages of 4 yolks - two stabilized with sugar, and one stabilized with salt. Hope to use them in future recipes!) Allow the egg whites to come to room temperature, slightly colder than room temp. will work fine. While waiting for the egg whites to warm up, combine white rice flour, brown rice flour, tapioca starch, corn starch, and 1 1/4 cups sugar in a bowl. "Sift" by stirring with a fork until the dry ingredients are well-mixed. With electric hand mixer, beat eggs until frothy. Add in salt and cream of tartar. Continue beating the eggs until they have risen significantly and begin to form stiff peaks. Add in remaining 1/4 cup sugar and beat until the sugar has mixed in.You do not need to beat the eggs until they are dry. But they should look something like this.


Gently fold in vanilla extract. Add in dry ingredient mixture 1/2 cup at a time, folding into egg mixture gently. Pour mixture into ungreased angel food cake pan. Bake for around 45 minutes, or until cake has turned a deep golden brown and springs back when lightly touched. Invert pan on cooling rack, three coffee cups spread around outside of pan, or over a narrow-necked bottle (or using the little feet on the bottom of the pan, if yours has them). Cool for at least an hour. Using a butter knife, go around the outside edge, inside edge and bottom of the cake pan until it comes cleanly off the pan.

Serve as is, with berries, whipped topping, or drizzled icing.


Doesn't that look awesome?! A slice for you...


Wednesday, August 3, 2011

Chocolate Fruity Pebble Treats

I'm still packing my meals for Vacation Bible School this week. I've been kinda boring and have stayed with a cold meat sandwich on bread each night. Tomorrow night they are grilling hot dogs, so I think I'll eat a hot dog without the bun and pack my own side dishes. Hopefully that will work out all right.

Each night the kids get a dessert of some sort with the meal. I've just packed basic sides like GF pretzels, raisins, plantain crispers, etc., but then I heard that Fruity Pebbles are gluten-free now. I decided I should make myself a dessert, and I wanted to use Fruity Pebbles. So, I made a quick trip to the local grocery store, picked up some Fruity Pebbles and came home. The box did NOT say gluten-free on it, so I went to Post Cereal's website. It did confirm that Fruity Pebbles and Cocoa Pebbles are gluten-free, but if you have specific dietary needs, I would recommend calling or emailing the company with your specific questions. As with all my recipes, please double check what you are using to ensure that it is gluten-free and safe for you.

Not the greatest picture, but here's what I came up with for my Vacation Bible School dessert:


***Chocoalte Fruity Pebble Treats

1/4 cup (or 1/2 stick) butter or margarine
1 pkg. (10.5 ounce) mini marshmallows
1 box Fruity Pebbles
2 Tbsp. cocoa powder
2 tsp. sugar

Line a 9x13 pan with foil and grease foil. In a very large, microwave-safe bowl, melt butter with cocoa and sugar on high for about 45 seconds. Stir well. If the mixture isn't melted, add another 10-15 seconds and stir again. Add marshmallows and toss with the chocolate mixture until the marshmallows are coated. Microwave 1 1/2 minutes (stopping after 45 seconds to stir), or until marshmallows are completely melted. Add Fruity Pebbles cereal and mix well. Spoon mixture into prepared baking dish. Dampen hands with water and firmly press cereal mixture into pan until evenly spread. Allow the treats to cool. Cut into about 15 squares.

Hope you enjoy these! They lasted all of one day at my house!

Sunday, July 31, 2011

Gluten-Free Banana Bread

The title says it all! Banana bread! I can remember my mom baking banana bread and zucchini bread quite a bit when I was still living at home. The smell of it baking in the oven takes me back to childhood, and really, I can't think of a better breakfast than a warm piece of banana bread. Fortunately for me, my husband loves to bake banana bread. But, after I stopped eating wheat, he felt guilty making it. He didn't want to make something that I couldn't enjoy, but he was nervous about gluten-free baking.

He watched me bake a few things gluten-free, and then one evening while I as at a meeting, he surprised me. I came home to freshly baked banana bread. At first, I felt sad because it looked so good and I assumed it was not something I would be able to eat. Imagine my surprise when he told me that it was gluten-free! An even bigger surprise was that it tasted so good I wouldn't have known it was gluten-free if he hadn't told me! He baked another loaf today, and I decided the recipe was good enough I would share with you.


***Gluten-Free Banana Bread
1 cup sugar
1/2 cup oil
2 eggs, beaten
1 tsp. baking soda
1 cup brown rice flour
1 cup white rice flour
3 ripe bananas, mashed
1 tsp. xanthan gum
pinch of salt
1 Tbsp. sour milk (2/3 Tbsp. milk, 1/3 Tbsp. vinegar)

Preheat oven to 350 degrees. Mix oil, sugar, and beaten eggs. Add flours, soda, salt and xanthan gum. Blend in bananas. Bake in large, greased loaf pan, or in round cans for about an hour, or until bread has turned deep brown in color.

Sunday, July 24, 2011

Cherry-Oat Crisp

I've been on a fruit kick lately. The produce all looks amazing at my grocery store right now, and I always get excited when I can eat fruits and veggies that are in-season. Usually when I go shopping with my kids, they beg for apples, bananas and grapes. This time they begged for grapes (green and red), which we got, but the ripe, dark cherries caught my eye. We were preparing for a family picnic, and the cherries looked perfect for a finger food for our meal-on-the-go. I pitted several cherries for the picnic lunch, and they tasted fantastic! But, there were lots of cherries left and I couldn't stand to see them go to waste. The result: a delicious cherry-oat crisp that can be eaten by itself or as a topping over ice cream.

The best part of the recipe is that it doesn't use any flour at all. It has very few ingredients, and will delight gluten-intolerant people and gluten-eaters alike.

First, wash and pit your cherries. Then place them into the bottom of a greased, 8-inch square baking pan.


I wanted the taste of brown sugar, but I didn't have any at home. So, I made some. Super easy! Just mix sugar and molasses. Grandma's brand Molasses is marked gluten-free right on the jar.


Work the molasses into the sugar until it looks like this:


Mix the brown sugar you just made, cinnamon, gluten-free oats (like the rolled oats at Bob's Red Mill), and oil together. Sprinkle over the top of the cherries. Now it is ready for the oven! Bake for about 40-45 minutes, or until the juice from the cherries starts to soak into the oats. The oats will remain crunchy. That's part of what I love about this recipe!


***Cherry-Oat Crisp

2 1/2 - 3 cups pitted cherries
1/2 cup sugar + 1/2 Tbsp. gluten-free molasses (or 1/2 cup brown sugar) - it is a pretty sweet treat. Feel free to reduce amount of sugar.
1/2 tsp. cinnamon
1/2 cup gluten-free oats
scant 1/4 cup oil

Preheat oven to 350. Pit cherries and place in greased,  8-inch square dish. Combine molasses and sugar in a medium-size bowl until brown sugar forms. Stir cinnamon, gluten-free oats, and oil into the sugar until well combined. Sprinkle sugar and oat mixture over the cherries. Bake for about 40-45 minutes, or until the oats begin to soak in a little of the cherry juice. Let cool for 10-15 minutes before serving. Serve either over ice cream, or by itself. If you'd like a goopier ice cream topping, or if your cherries aren't very juicy, place 1/4 cup water in the baking dish with the cherries before coating with the sugar and oat mixture.

Saturday, July 23, 2011

Never-Use-A-Box-Again Brownies

Please never go out and buy a brownie mix again! You don't need it! It doesn't matter your level of baking expertise, whether you are able to burn water as it boils, or even if you have a track record for screwing up the heating of a frozen dinner. You can make these! I have faith in you!

Now that you've had a little pep talk, I hope you are ready for a recipe that will revolutionize the way you make a meal. These brownies are so simple that they whip together with very little effort, and all you have to do is smell the deliciousness as they bake for 25 minutes. They are a perfect oh-shoot-I-didn't-plan-dessert-for-my-guests dessert. 5-10 minutes of active time, and you've got something in the oven for your dinner guests. My mom used to make brownies that tasted almost identical to these. She never needed to buy a box of brownie mix because this recipe uses things that most bakers have on hand. It wasn't until I recently asked for the recipe that I realized it was a recipe my Aunt B. learned when she was in 4-H.

The original recipe only calls for 1/2 cup of flour, which is the perfect amount for a one-flour, gluten-free substitution. The more flour a recipe calls for, the trickier it is to make a gluten-free substitution. When a recipe calls for 2-3 cups of flour or more, it is best to make a blend of flours to substitute. I will share my flour blend in another blog post in the not-too-distant future. Anyway, I'm digressing. I'm far too excited about this brownie recipe and it has me off-track. Back to the delicious matter at hand...


Never-Use-A-Box-Again Brownies (Adapted from Aunt B's 4-H recipe)

1/2 cup brown rice flour
1/3-1/2 cup cocoa (depending on how chocolate-y you want your brownies)
1/3 cup melted butter or margarine (or oil if you are eliminating dairy)
1 cup sugar
2 eggs, unbeaten**
1 tsp. gluten-free vanilla (like McCormick brand)
1/2 tsp. xanthan gum**
1/2 cup broken nut meats (optional)

**for more cake-like brownies, use three eggs and omit xanthan gum. There is nothing "wrong" with xanthan gum, but it is a processed food, and I like to avoid it when I can.

Preheat oven to 350. Lightly grease 8-inch square baking pan, or line it with parchment paper. Mix brown rice flour, cocoa and sugar until mixed thoroughly. Stir in melted butter (or margarine, or oil), 2 eggs (3 for more cake-like), vanilla, xanthan gum (if using), and nuts, if desired. Mix well. Pour batter into prepared baking dish and bake for about 25 minutes.

If you can (I know I don't have the will-power), wait to serve until brownies are mostly cooled. They taste better, and don't fall apart as easily.

Enjoy! And never buy a box again!

Thursday, July 14, 2011

Oatmeal Cookies (gluten-free AND egg-free)!

Usually my husband leaves the cooking and baking to me. He is more than capable of doing both, but he knows I enjoy it, and he has no problem eating what I make! More recently, though, he has taken a liking to baking gluten-free treats so that I have home baked treats that I didn't have to work for. Very sweet of him! On this particular occasion, my darling husband decided to try his hand at gluten-free oatmeal cookies. He started out following a recipe, but quickly realized we were out of almost every ingredient he needed! He got online and started googling substitutions. Then he dumped what he could find into the bowl. I had serious doubts that the cookies would hold together, but we've made them twice now and they hold up great (and taste great, too)!

The first time he made them, it was a very hot day and they flattened more on the pan. Yesterday, it was a much cooler day and they stood up nicely. Either way, they were attractive and delicious. I took them to a meeting this morning and no one would have known they were gluten and egg free if I hadn't told them. And so, here it is:


The Husband's Gluten and Egg-Free Oatmeal Cookies

1 cup softened butter (2 sticks)
1 cup sugar
1 cup brown sugar, packed loosely
3 Tbsp. oil
5 Tbsp. water
2 tsp. baking powder
1 tsp. baking soda
1 1/2 tsp. vanilla (McCormick brand is now certified gluten-free)
3/4 cup brown rice flour
3/4 cup white rice flour
1/2-3/4 tsp. xanthan gum (I like to use as little as I can get away with, so I use the 1/2 tsp.)
1/2 tsp. salt
4 cups old-fashioned oats

Preheat oven to 375. To soften the butter, place the sticks of butter (in the package) on a microwave safe plate. Heat in the microwave for 15 seconds. Cream butter and sugars together. Beat in oil, water, baking powder, and vanilla until well combined. Add flours (pre-sift if desired, I often skip the sifting), baking soda, and salt. Stir in oats. Mix well. Drop by teaspoonfuls onto ungreased baking sheets. Bake 9-10 minutes, or until tops turn light golden brown. Makes about 3 dozen small cookies.

I hope you enjoy them! I know my kids keep sneaking them when I turn my head!

Sunday, July 10, 2011

Gluten-Free Birthday Cake - A Prehistoric Endeavor

I have two kids and their birthdays are only two days apart. They are two years apart in age, but their birthdays are so close together that we've had a combined birthday party for the past two years. As we were gearing up for "Birthday Land" at my house, I asked each child what theme they wanted for the party. My oldest requested dinosaurs. My youngest wanted zoo animals. I thought each theme was wonderful, but I had no idea how I could create one cake around both of those themes. Our birthday parties are small - just my husband, my kids, me and grandparents, so there would simply be no need for lots of cake. But, I also wanted each child to feel special at the birthday party and to enjoy the cake I made for them.

In addition to this challenge, I also wanted to make the cake gluten-free. I wanted to be able to enjoy the cake with my kids on their day, and my youngest child has shown some small indicators of food allergies as well. I wanted a cake that would be safe for all of us. I also wanted it to be something my gluten-eating relatives would enjoy.

First, I happened upon this recipe for gluten-free yellow cake. I decided to do a trial run about a month before the birthday just to make sure the cake would turn out well. I turned that cake into chocolate covered cake balls (oh, yum! Will definitely share this recipe in the future!). The cake was a success. My husband said the cake balls tasted as good as the Starbucks Cake Pops. What a compliment!

Then, the night before the birthday party, I baked the cake again. This time I lined the 9x13 cake pan with parchment paper. I followed the recipe I linked above, poured the batter into the cake pan, and then baked for about 25 minutes. It might take more or less time in your oven. Check the center of the cake with a toothpick, and it if comes out clean, it is done. My cake began to turn golden brown on top. Once the cake was cool, I gently lifted it out of the pan and placed it on one of my nicer-looking cookie sheets. Then I trimmed away the excess parchment paper. I left the paper on the bottom of the cake, but you could remove it if you were feeling adventurous.


When I decorate my cakes, I prefer to use pre-made frosting. I'm a busy mom, and what I care about is giving my kids a cake they will love and remember. I've never dabbled in fondant. Maybe sometime I will. But, for now, I'm able to do most everything I want with store bought frosting. I was pretty geeked to learn that Betty Crocker frosting is now certified gluten-free. Check the back of the can yourself. Let me know if you do a little jump right there in the store. I know I did, and it would be nice to know I'm not the only one! For this cake, I kept some of the frosting white (I used vanilla. Whipped white will also work.), made some of the frosting green, and made a small amount of it blue.

I started the decorating process by making a t-shaped path on the cake using white frosting. Next I iced the remaining quadrants with green frosting. I also made the sides of the cake green.

Once the basic design was iced onto the cake, I created a "cobblestone" path using Rice Chex. Can you tell I love that Rice Chex are a gluten-free food? I left a little bit of white frosting visible on either side of the path. This allowed me to add a "fence" later on in the decorating process. I'm not sure how much Chex I ended up using. Maybe a cup or so. We keep Chex at the house for making "bread crumbs" and as a breakfast option, so we had some in the house already.


Next, I "fenced" off each green rectangle with gluten-free, vanilla wafer cookies. I used Schär brand cookies, but I hear Glutino makes them as well. I had to cut a few of the wafer cookies with a knife so that they would fit properly on the cake.

The only other thing I had to make for decorating involved pink tootsie rolls. I took one pink tootsie roll, broke it into two pieces, flattened the pieces and put a little strip of white frosting down the center of each piece. These served as "T-bone steaks" for the cake. The rest of the cake was created using little plastic toys my kids already had. I washed the toys thoroughly first, of course, and then arranged them on the cake. When all was said and done, we had a PREHISTORIC ZOO! Both kids loved it (and it tasted great too)!


Prehistoric animals were paired up with their modern relatives in each zoo exhibit. The king of the dinosaurs (T-rex) was paired up with the king of the jungle (a mighty lion). A long-neck brachiosaurus was eating leaves from the treetops next to a giraffe. A rhino and a triceratops drank from a pond (blue icing outlined with gluten free Rice Krispies). An armored euoplocephalus was next to an armadillo. Give a few candy steaks to the meat-eating T-rex and lion, stick on a few trees with icing to the cookie sheet, and VOILA! A birthday cake that two kids can agree on. It tasted great, it was gluten-free, and no one felt like they were missing anything.

In addition to the ingredients for the yellow cake and the Betty Crocker frosting, you will need:

Around 1 cup of Rice Chex
A few Rice Krispies to outline the pond, and maybe a handful more to make a desert environment for the armored animal/dino
1 pink tootsie roll
1 pkg. Schär brand vanilla wafer cookies
Food coloring: green and blue
1 skewer cut in half and sanded until ends are smooth
Small piece of paper for creating a "Prehistoric Zoo" sign (personalize as is appropriate for you)
Desired dinosaur and animal plastic toys
Plastic trees, cactus, or other desired zoo decor
1 or 2 plastic people to visit the zoo

Total decorating time was not much more than an hour. Allow more time if you've never decorated your own cake before. And then, trust yourself! You can do this and your kids (or other family members/friends) will love it!