Monday, February 13, 2012

Crayon art! Turning crayons into a scene from "The Lorax"

Recently I joined Pinterest. I knew it would be a big mistake, and it has been. But, a very good one! I worried I would spend too many hours on Pinterest, but that is not exactly what has happened. I spend a few minutes a day on Pinterest, and hours on the projects I am inspired to do. Overall, that's not a bad thing! Except on days like today when I really need to be cleaning, or cooking, or something. Surely there is something else I should be doing, right?

The latest craze on Pinterest is melted crayon rainbow art. I'm sure you've seen it, but in case you haven't, it looks like this:


Very cool idea! Very colorful, and simple execution. Plus, who doesn't like melting crayons? It is fun, and you can get kids involved in the creation of art to hang around your house.

I love it, but I wanted to do something different. I googled "melted crayon dot art" because I had an idea in my head. And I found someone else who had tried it! This blog has a great photo tutorial for making your own dot art (or crayon pointillism if you want to sound super knowledgable and artistic):


My husband and I have recently started working to turn a strange little space at the top of our stairs into an art area for the kids. I decided I wanted the space to feel like a scene right out of my oldest's favorite book "The Lorax" by Dr. Seuss. So...here's what happened.

I went to Hobby Lobby and got a 2-pack of 11x15 canvases for only $5.99. Then I located the tremendously enormous box of crayons that no one uses anymore. Many are broken, misshapen, etc. But that doesn't matter for this. Keep in mind that you will need a LOT of certain colors if your picture has large spaces that are all the same color.  Then I chose a two-page spread from "The Lorax."


I decided to leave off the text, the Once-ler and his wagon, and the swans. I might add them somewhere else in the art nook a bit later.

Then I took a pencil and lightly sketched the main elements of the pages


Then it was time to start melting! I melted my crayons over burning candles. Be very careful if kids are going to be around while you do this. I would not recommend trying this with young children who want to help you. Each color melts at a different rate. Be careful because some colors burn if held too close to the flame. It was helpful for me to have a sheet of paper towel on hand in case I need to wipe burned wax off of my crayon.

By accident I made the sky too dark. Some colors melt a lot darker than you might think. But, I ended up making a two-tone sky, and it added a lot of depth. Here's the original sky color.


A close up of the texture on one of the canvases.


I don't consider myself an artist at all. My drawing skills are very limited. But crayon art is perfect for me! It is very imperfect by nature. All you need to be able to do is draw a basic picture, and then stamp the crayon into the right spot on your canvas. Very time consuming, but deeply gratifying.

Here's the finished diptych.


The art space is definitely not finished yet, but here's what my pictures look like on the wall.


If you decide to try this project for yourself, I'd love to see what you come up with!

Thursday, February 2, 2012

Crochet Wristwarmers

Most of what I post on my blog has to do with gluten-free cooking and baking. Occasionally I've shared some of my writing. Today I'd like to share something I recently crocheted.


She looks like such a big girl reading her magazine (an Oriental Trading catalog - haha!) while wearing these little purple wristwarmers.

I was pretty pleased with myself that I whipped this pair out with no pattern. Hard to believe just a couple of years ago I was afraid to make hats!

Thursday, January 26, 2012

GF Soft Pretzels and Pretzels Dogs

We make soft pretzels all.the.time at my house. My preschooler thinks they are some kind of manna - necessary for life. At first, we made them all in the standard pretzel shape, but we've since grown more inventive. These can be shaped like letters, numbers, or even cut out with cookie cutters. My preschooler's current favorite are "Christmas pretzels." They are his favorite snack - even in late January!

This recipe is so easy, I had to share. I use my Gluten Free Flour Recipe #1 and it does not have xanthan gum added. If your flour includes xanthan gum, do not add more. If you do not need to eat gluten-free, you may use all-purpose (gluten) flour and omit the xanthan gum.


***Soft Pretzels
1 cup warm water
2 Tbsp. yeast
2 tsp. honey
2 2/3 cup flour mix (possibly more if dough gets sticky)
1 tsp. xanthan gum (if not included in your flour mix)

1 egg for brushing over the top (or melted butter or oil)
Kosher salt

Preheat oven to 425. Lightly grease cookie sheet. In large bowl, dissolve yeast in 1 cup warm water (NOT hot). Add honey, flour and xanthan gum (if needed) to yeast mixture. Blend into dough. Knead until well mixed. If necessary, add more water if dough is too dry to work with, or flour if dough is too sticky. Form dough into snake shapes (I do small pretzels, but any size will work), and shape as desired.  Beat egg in a bowl. Brush pretzels with egg (or oil or melted butter) and sprinkle with salt. The egg will cause the pretzels to brown, so spread it as thoroughly across the pretzels as you can. My picture above shows what happens if you don't get it over the whole pretzel!

Bake 8-12 minutes, or until pretzels begin to brown on top.

Super easy!

With the Super Bowl coming up, I've begun planning a "snacky foods" day for my little family. I thought pretzel dogs would be good, but I wanted to test them out before game day to make sure it turned out. I learned some tips along the way, and by the end, I was a pretzel-dog-rolling pro.

You need wax paper for this project in addition to hot dogs and all the ingredients for the pretzel recipe above.

I think they are worth the work. My two-year-old ate two whole pretzel dogs, and she normally eats like a little bird.

***Pretzel Dogs

Prepared pretzel dough (see recipe above)
8 hot dogs (make sure they are GF)
Lots of wax paper and a rolling pin

Mix pretzel dough. On clean work surface, spread out wax paper. Place dough on wax paper. Top with second sheet of wax paper. Roll dough out until it is about 1/4 inch thick. Trim edges of dough to form neat rectangle or square shape. If you are using standard length hot dogs, cut dough into 4 inch by 4 inch squares. With knife, gently go under dough to release it from wax paper. Place square away from the rest of the dough. Put hot dog on the dough, just like this picture below.


Here's where it gets a little tricky. GF dough is notoriously brittle. What worked for me was lifting the wax paper as I rolled. Roll slowly and patiently. If dough starts to stick, gently encourage it with your fingers or a knife to release from the paper. If it starts to break, press it back together with your fingers. It will hold together, you just have to be patient.

Once the dog is rolled up in the dough, place it (seam down) on a lightly greased baking sheet. Repeat until all hot dogs are wrapped. Brush hots dogs with egg and sprinkle with salt. I use kosher salt because the crystals are larger.

Bake at 425 for about 15 minutes. The tops won't brown a lot, but they will brown some. Bake until the bottoms are a nice golden color.


The pretzel dog closest to you in this picture is the last one I rolled. As you can see, I got better as I went along. They tasted great, and we look forward to having them for the big game!

Sunday, January 15, 2012

Peanut Butter Granola Clusters

I can't take any credit for this recipe, but it makes a hearty, tasty, relatively-good-for-you treat, and I wanted to pass it along! I found this recipe in the Relish magazine insert that comes in my weekly newspaper. You can find the recipe on their website using this link:

Peanut Butter Granola Clusters Recipe

I used honey rather than brown rice syrup, and I was short on dried cranberries so I just added in some raisins to make up the difference. As long as your oats are certified GF, there shouldn't be any  substitutions needed.


These clusters do get pretty crispy, and they are a little on the fragile side while they are cooling. Let them cool almost all the way before removing from the parchment paper. Because of the protein in the peanut butter and the hearty oats mixed in, these clusters stuck with me for quite a while. Hope you enjoy these as much as we did at my house!

Friday, December 30, 2011

A perfect way to close out the year: So many firsts!

I didn't intend to spend so much time away from my blog. The holidays are a time of confusion, worry and fear for newly diagnosed gluten intolerant folks, and so I had intended to share my favorite holiday recipes with you. And, then I had a family emergency.

My grandpa was not well, and we rushed to be at his bedside. Unfortunately, we got stuck in the first (and practically only) snow to track through the central United States. We did not make it in time to be with him, but we made it in time to support my family and to lean on them as we all grieved. After that, I've been in a funk. I haven't been able to get myself into the mood for much of anything. Christmas was something we tried to muddle through even though we never really felt like buying gifts or doing anything festive.

But we did it.

We got our annual Christmas letter out on-time, albeit very pared down from previous years. I think pretty much everyone got a gift from us. I'm behind on my thank-you notes, but I've done what I could to this point. The last item on my holiday checklist is my Three Kings Cake. I make one every January 6, hide a baby Jesus in it, and we make a game out of seeing who can find the hidden baby in a slice of cake. I have made a different style of King Cake every year, and I was searching through some of my favorite blogs to see what I could make this year.

One of my favorite bloggers is Gluten Free Girl, but she has started making all of her recipes by weight, which left me only able to enjoy her recipes visually. I felt unable to bake by weight, but her writing and culinary creations still inspired me.  As curious happenstance would have it, my dear best friend bought me a kitchen scale for Christmas. Only a week later I happened upon this gem of a recipe for Cardamom Fruit Bread on Gluten Free Girl's blog. I decided this bread would be a perfect challenge for me. My Grandpa had an uneaten fruitcake in his refrigerator before he went into the hospital. For whatever reason, I could not stop thinking about that fruitcake. I had never had fruitcake before, and had never really thought of trying it. I believed Johnny Carson that only one fruitcake was in existence and was re-gifted throughout history. But, there had been one in Grandpa's refrigerator, and this fruit bread on GFG's website looked like something I wanted to try. Besides, I had a kitchen scale now and had no excuse not to make it.

The only things I didn't have on hand were candied fruit and cardamom. Cardamom was easy to get, but I could not find any candied fruit without high fructose corn syrup. So, I bought golden raisins, dark raisins, chopped dates, green and red maraschino cherries (Yeah, I know, not healthy at all), and an orange. I chopped the cherries and the orange zest and then followed this recipe for candying fruits. Super simple! You should give it a try! I blanched the orange peel twice and then followed the syrup recipe. Once I made the simple syrup, I poured in some rum and then brought all of the dried fruit and orange peel to a simmer for 30 minutes.

I didn't have a bundt cake pan, but I did have an angel food cake pan. The end result was beautiful!


Lots of color throughout. My favorite part was the candied orange zest. Yum!


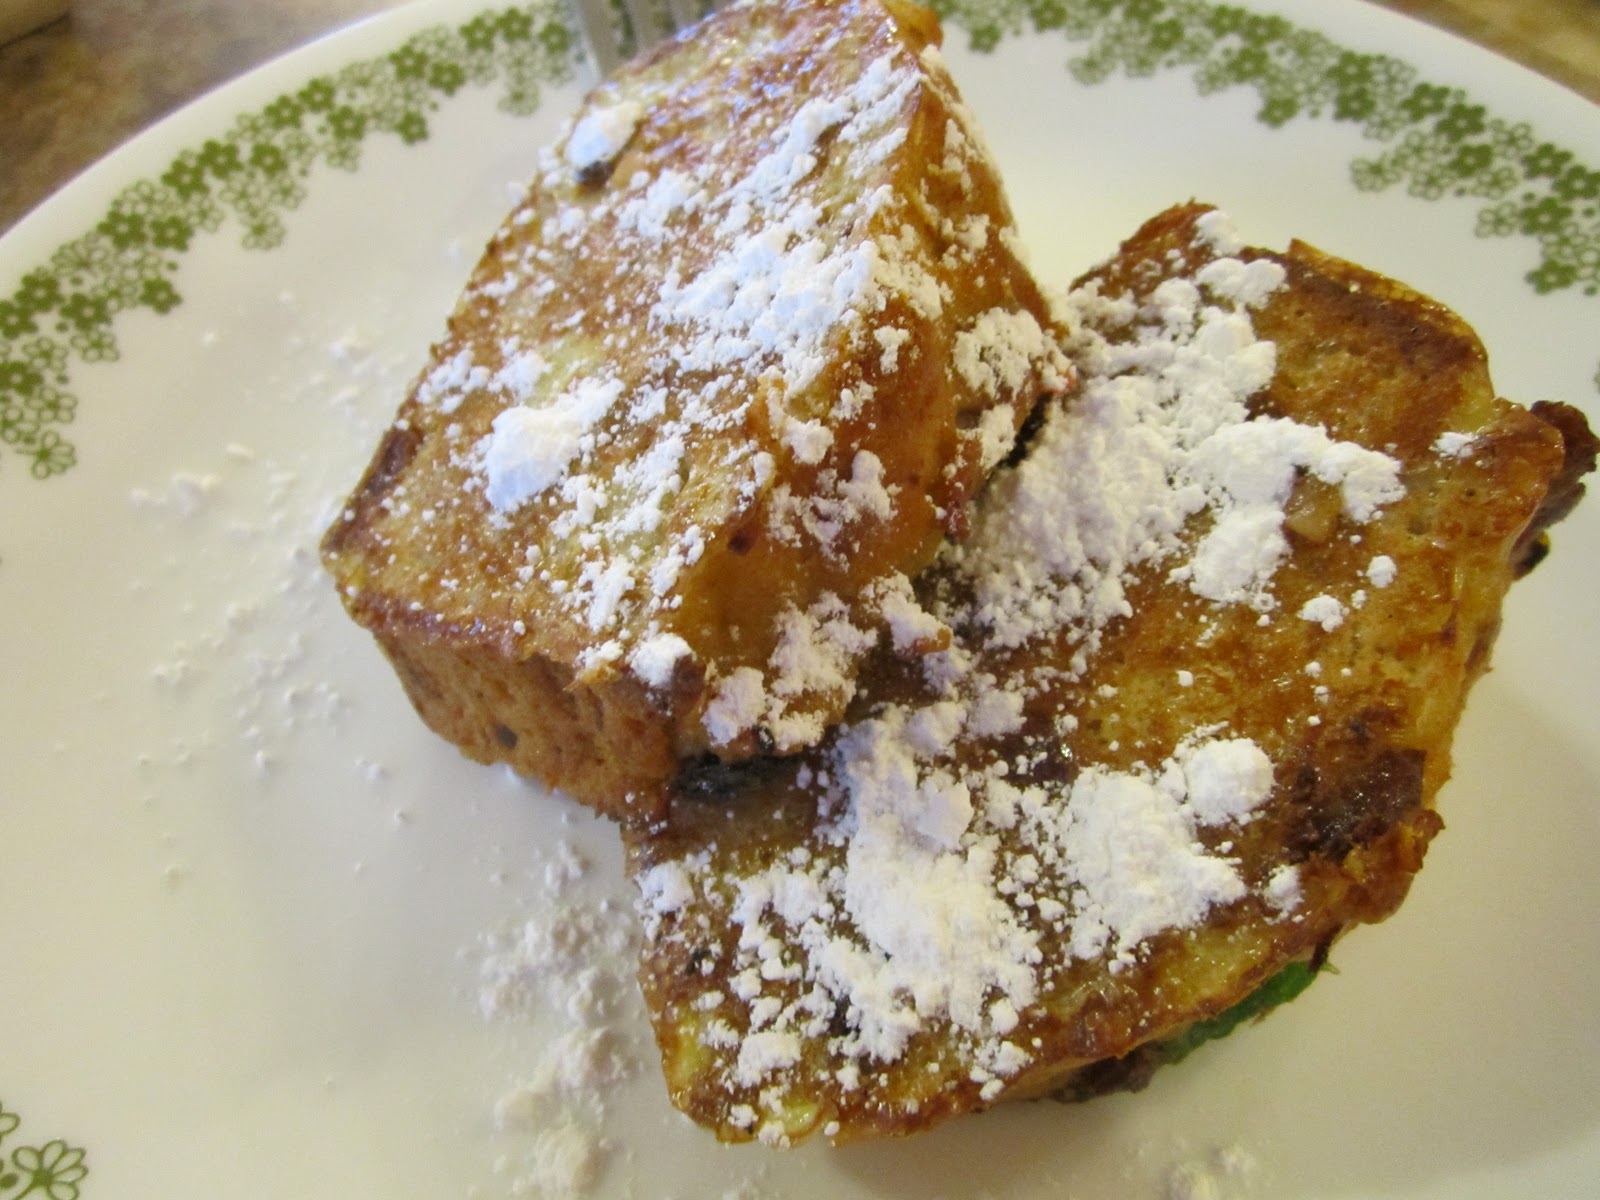
We worked on the bread for a couple of days, and then I decided to make french toast with the rest of it. I sliced up the leftover bread and used my recipe for Almond French Toast. I topped mine with a sprinkle of powdered sugar.


And so, my hope for you is that your new year will be filled with newness. Try a new recipe. Bake by weight, if the fancy strikes you. Go out and accomplish that goal you've always dreamed of but were too afraid to try. Candy some fruit. It really isn't that hard. Whatever it is that you do, do it to the best of your ability. But, above all else - love. Have a very happy, love-filled (and fruit-bread-filled) new year!


Saturday, November 26, 2011

Our Thanksgiving Spread

Happy belated Thanksgiving to everyone reading from the United States!

This year we did almost all of our food preparations the day before, and it was the first Thanksgiving in a long time that was nearly stress free! It made it worth all the work and prep on Wednesday to have a laid back Thanksgiving Day with my family.

Here was our spread:


Quite a lot of food for the four of us, but we've got plans for the leftovers. We don't like to waste food at our house.

This year I wanted to make the traditional dishes, but I wanted to find new ways to serve them or prepare them. I'd heard a lot this year about roasting stuffing in a large pumpkin. That sounded awesome to me, but all of the grocery stores I checked had gotten rid of their pumpkins after Halloween. I found a large winter squash with a nice top for a lid and decided to use that instead. I was really pleased with how it turned out!


Beautiful!

Perhaps you already knew this, but I didn't! Funyuns are gluten free! That suddenly meant I had the perfect topping for my crockpot green bean casserole! I like my green beans to have some crunch, so I also added slivered almonds and chopped water chestnuts.


I also made "cranberry soda" by mixing some 7up with cran-apple juice. My kids loved that special treat. I made my traditional crustless pumpkin pie recipe, but baked it in 4 custard dishes instead of one pie plate. I took some KinniToos cookies, Jelly Belly candy corns (yum!), fruit by the foot for wattles, and raisins for eyes. For the kids I did more candy corns for feathers. For my husband and I, I used almonds. Just use a dot of frosting to hold the facial details in place on the cookies.


And then, after we ate, I tried to get a picture of our little family. This was take 25 (or more), and still not everyone was looking at the camera. Oh well!


Kids look like they are quickly slipping into a food coma.

I hope you had a fabulous Thanksgiving with those who are important to you! Any culinary experiments you'd like to share?

Monday, November 21, 2011

What's on the menu? Our gluten-free Thanksgiving menu

Hard to believe Thanksgiving is just three days away.

It is amazing to me the difference between this Thanksgiving and last. Last year, I realized in October that most of my favorite Thanksgiving foods were off-limits. No more Stove Top stuffing. No more green bean casserole. No gravy. No Parkerhouse rolls like Grandma always made. I felt like someone told me I had to sit at the table at Thanksgiving but wouldn't be allowed to eat anything. Perhaps you have felt that way before.

I spent that month before my first GF Thanksgiving looking up recipes on countless gluten-free blogs, experimenting in the kitchen, and having to eat all the successes and toss all the fails. In the end, I had a nice meal with my family. There were a few favorites I couldn't replicate, but we did pretty well.

Yesterday I tried to make GF Parkerhouse rolls. They aren't totally perfect, but they tasted great. I stuck these in the freezer so I won't have to deal with it on Thanksgiving Day.


If you are feeling overwhelmed as you approach the holidays and need to eat gluten-free, I want to tell you that it really does get easier. This year feels so much less stressful than last year. I'm super excited about my menu. Can't wait to try everything! Here's what we're doing:

Turkey (I tried to convince my family to let me try something new and they said no - boo!)
Homemade Stuffing in a Roasted Winter Squash
Crockpot Green Bean Casserole
Mashed Potatoes and Gravy
The Husband's Baked Beans
Parkerhouse Rolls - they aren't perfect, but I'm getting there!
Mini Crustless Pumpkin Pie Turkeys
Cranberry Soda

So, what are you having at your house?

Friday, November 18, 2011

Upside Down Taco Pizza - and taco seasoning recipe

Every once in a while I get an idea in my mind for a recipe experiment and once it's in my mind, I can't stop thinking about it until I try to make it. On my most recent menu plan, I wanted to try making an upside down taco pizza with Food Should Taste Good's lime chips on top. I had never tried their lime chips before, but I knew they would be great because I've loved every other FSTG chip I've tried. Just in case you were wondering, I was even more pleased with the lime chips than I thought I would be. The lime flavor is so subtle, but so zesty at the same time. I don't know how they pulled it off, but these chips are perfect!

The upside down part was inspired by Crockpot 365's slow cooker puff pizza recipe (which is fantastic, by the way).

I have heard that McCormick's mild taco seasoning mix is gluten free, but I forgot to pick some up. That meant creating a taco seasoning recipe in addition to a taco pizza recipe. So, today you will get two for the price of one. :)

***Taco Seasoning
1 Tbsp. tapioca starch
1 tsp. chili powder
1 tsp. paprika
1/2 tsp. salt
1/2 tsp. cumin
1/2 tsp. dried minced onion
1/4 tsp. sugar (optional)
1/8 tsp. black pepper (pretty much two good-size dashes)

Mix all the ingredients in a bowl. There you go! To use for regular taco meat, brown 1 pound ground beef. Then add in either 3/4 cup water or 1 can (8 oz.) tomato sauce. Then mix in the taco seasoning mix. Cook until the majority of the liquid has been absorbed. Yum!


***Upside Down Taco Pizza
1 bag Food Should Taste Good lime chips (or about 15 chips), or any other GF corn chips
1 pkg. GF taco seasoning mix, or prepared homemade taco seasoning mix (see above)
1 pound ground beef
1 can (8 oz.) tomato sauce
1/4 cup water
1 cup grated cheddar cheese (plus a little for sprinkling on top, if desired)
1/2 cup brown rice flour
1/2 cup white rice flour
1 cup milk (or milk alternative, I used almond milk)
2 eggs
Shredded lettuce, and any other desired taco toppings

Preheat oven to 400. Grease 9x13 baking dish. In skillet, brown ground beef. Drain. Add tomato sauce and taco seasoning. Mix well and cook until some of the liquid absorbs. Add about 1/4 cup water to mixture. Stir to combine. Remove from heat.

In medium-size bowl, combine flours, 1 cup cheddar cheese, eggs, and milk. Pour meat mixture into bottom of 9x13, spreading evenly to coat. Pour flour-cheese batter over the meat, and use a spoon to spread it evenly over the top. Bake for 28-30 minutes, or until cheese has melted and puffy dough on top springs back when touched. Top with desired cheese, lettuce, and any other taco toppings. Last, top with lime chips. If you want your lettuce to wilt a bit, you can stick it back in the oven for about 1 minute.


Yummmm! My husband forced himself to stop after eating seconds (I think he ate 4 of these sections) because he wanted to have leftovers for lunch! I think that's a compliment!


For anyone wanting to make this NOT gluten free, just substitute 1 cup all purpose flour for the brown and white rice flours.

I read an article today that said pizza is the number one food people eat the night before Thanksgiving. If you traditionally eat pizza the night before the big Turkey Day, why not give this taco pizza a whirl. Hope you enjoy this as much as we did.

Monday, November 14, 2011

Donut "Wholes"

Yes I know you can buy gluten-free donuts at the store.

But, there's just something about buying food that is vacuum sealed and contains a packet for freshness that says "DO NOT EAT." Yeah, something about that just isn't appetizing to me.

I made baked donut holes a while back (recipe here), and they turned out so well! But, I kinda wanted something more. I wanted a whole donut...the only problem being that I do not have a donut pan, nor do I intend to buy one any time soon.

And, so I present to you Donut Wholes - a complete donut with no hole in the middle. And yes, I know, that pretty much makes this a muffin. But, whatever. The texture is light and airy just like a delicious bakery-style donut. So, I'm still calling it a donut. You are free to call it whatever you would like. I make these in a muffin pan, filling each cup about 1/2 full. If you fill the cups more than that, the mixture grows and expands and starts looking a little too muffin-ish. At that point, you can't really get away with calling it anything but a muffin!

This was also my first time working with ground flax seed.


Glorious golden goodness right there.


***Donut Wholes
1/2 cup (heaping) brown rice flour
1/4 cup tapioca starch
1 Tbsp. ground flax seed (about 1/2 Tbsp. whole flax seed) mixed into 2 Tbsp. boiling water
1/2 cup sugar
1 tsp. baking powder
1/8 tsp. nutmeg
1 tsp. cinnamon
3 Tbsp. almond milk
3 Tbsp. oil
2 eggs

Topping (if desired): Melted butter, 1/4 cup sugar mixed with 1 1/2 tsp. cinnamon

Preheat oven to 350.

Using a coffee grinder, grind 1/2 Tbsp. whole flax seed. Add the ground flax seed to 2 Tbsp. boiling water. Set aside.

In medium-size bowl, combine brown rice flour, tapioca starch, sugar, baking powder, nutmeg, salt and cinnamon. Stir until thoroughly combined. Slowly add in almond milk, eggs, oil and flax seed mixture. Stir until a smooth batter forms.

Grease 8 cups in a standard size muffin tin. Fill prepared muffin cups about 1/2 full. Bake 16-18 minutes, or until "donuts" spring back when lightly touched. Allow to cool slightly, then brush with melted butter and roll in cinnamon sugar mixture.

If you want them more like muffins, just brush butter and put cinnamon-sugar on the tops. Otherwise, go for the gold and coat the whole thing!

Just a word of caution. These muffins are fairly low fat, and so they have a tendency to stick to the muffin cups. Make sure you liberally grease the pan. Once they've cooled slightly, go around each "donut" with a fork until you are able to loosen it from the cup. Be patient. They usually don't break :)

Sunday, November 13, 2011

Apple-Teriyaki Pork Chops with Apple Gravy

This recipe is a gem! We've made it a handful of times now, and each time it has been well-received by everyone in our family.


Pardon the veggies. We were short on food in the house, so I heated up some stir fry veggies! I served the pork and gravy with brown rice rotini.

***Apple-Teriyaki Pork Chops with Apple Gravy

3 pounds bone-in, or boneless pork chops (about 5 small pork chops)
3/4 cup apple juice - I do 100% juice, no sugar added
2 Tbsp. sugar
2 Tbsp. gluten free soy sauce
1 tsp. ground ginger
dash of pepper

For the gravy:
1 1/2 Tbsp. cornstarch mixed into 3 Tbsp. cold water

Combine juice, sugar, soy sauce, ginger and pepper in crockpot. Add pork chops. Cover and and cook on low for about 8 hours, or about 4 on high.

Just before serving, remove the pork chops and pour liquid into a small sauce pan. Heat to boiling. Add cornstarch and water mixture, and continue cooking and stirring until a thicker gravy forms.

Serve with noodles or rice.

Friday, November 11, 2011

Product Review: Bakery on Main Peanut Butter Chocolate Granola Bars


A few months ago, I was on a road trip to see some of my extended family. When I arrived in town, I was told that the local grocery store was creating a gluten-free section and that there was actually quite a bit to choose from. When I had a chance, I zipped over to the store, and while there wasn't really a lot of selection, there was a new gluten-free section, and there were a few things I had never seen before.

One of those things was Bakery on Main granola bars. Now, I don't know if you are anything like me, but I can't go wrong with peanut butter and chocolate mixed together. Such a wonderful combination. So, I picked up a box of these and headed back to see my family.

These bars have good flavor, but the texture is a little interesting. They are VERY chewy, but you just never know how gluten-free products have been stored prior to selling. So, I hate to fault the company for something like this. Sometimes things are left on the shelf for much longer than they should be, or they are kept in less than ideal conditions prior to being shelved. The bars were not past their expiration date, but they were a bit chewy and a little stale. It did not bother me enough to keep me from eating the entire box before we came back home.

If you are looking for a PB and chocolate fix, these bars can help you with that. Just chew carefully!

Tuesday, November 8, 2011

Orange-Coffee Cake with Orange-Coffee Glaze

I love cooking and baking. I think that probably goes without saying! But one thing I had never tried to do (because it terrified me to think about!) was make a cake without a recipe. Cake just seems so finicky. Cupcakes are pretty forgiving, especially if you use muffin papers, but cake just seems like a different  animal altogether...or a different food altogether. Whatever.

Anyway, a couple months ago I got this strange idea in my mind of making a cake using coffee and orange juice. I have no idea where the idea even came from. But, once the idea was in my mind I had to make it even though I was terrified to make a cake without a recipe to guide me.

I am SO glad I followed my craving. This has become a favorite recipe for me, and it even makes wonderful cupcakes. My husband almost always has a pot of coffee on, so I steal just over a 1/4 cup from the pot and he can have the rest. Win-win.
***Orange-Coffee Cake with Orange-Coffee Glaze
1 cup white rice flour
1/4 cup brown rice flour
3/4 cup sugar
dash salt
3/4 tsp. baking powder
1/2 tsp. cinnamon
1/4 tsp. ground cloves
1/4 tsp. ground allspice
1/4 cup butter
1/4 cup milk + 1/4 tsp. vinegar
1/2 cup applesauce
1/4 cup brewed coffee
1/4 cup orange juice (no pulp is best)
2 eggs

Orange-Coffee Glaze
3/4 cup powdered sugar
2 Tbsp. butter, softened
1 1/2 tsp. brewed coffee
2 Tbsp. orange juice (again, no pulp)

Preheat oven to 350 degrees. Grease 8x8 baking dish.

In large bowl, combine flours, sugar, soda, salt, cinnamon, cloves, and allspice. Mix thoroughly. In 1/4 cup measuring cup, put 1/4 tsp. white vinegar and fill the rest of the way with milk. Let stand 5 minutes to create buttermilk. Add buttermilk mixture, butter and applesauce to dry ingredients. Pour hot coffee over butter to soften it. Add in orange juice and eggs. Mix until batter is smooth. Pour cake batter into prepared 8x8 baking dish. Bake for 30-35 minutes, or until cake springs back when lightly pressed.
Let cake stand for 15-20 minutes. In small bowl, combine softened butter, coffee and orange juice with powdered sugar. Mix until smooth. If making recipe as a cake, pour entire amount of glaze over the top, spreading to coat evenly. Glaze will look like this at first. It will continue soaking into the cake.


Let the cake mostly cool before serving. When the glaze has soaked in, it will look like this. It creates a wonderful layer right at the top of the cake. Oh yum. Drooling just thinking about it!


This recipe will make about 12 cupcakes/muffins if you decide to do it that way. I've served the cupcakes with or without the glaze.

I hope you will enjoy this recipe as much I have. And, don't be afraid to try and make your own cake when the desire strikes. Perhaps you will create a favorite too!

Saturday, October 22, 2011

Cabbage Pockets (Runzas, Bierocks)!

When I discovered wheat was a large part of my digestive troubles, I had two thoughts: 1) What about rolls at Thanksgiving?! (they were my favorite part of the meal), and 2) What about cabbage pockets?! I knew if I could come up with a gluten-free version of those two foods I would be OK. It took me a while to work up the courage, but I gave cabbage pockets a shot last night for the first time.

I made the dough with xanthan gum, but I'm trying to work that out of my diet too. I plan to make this recipe again using a slurry of boiling water and ground flaxseed in place of the xanthan gum. Once I do that, I'll give you an update on how it went, and will give you steps for doing that when you make these for yourself.

Let me first say, these made me so happy I almost cried. They tasted like home. They reminded me of my time in school (they made these quite often for school lunch), and they reminded me of my Grandma who made the best cabbage pockets in the world. My mom's cabbage pockets come close, but no one makes them like Grandma did! Once I tasted them, I knew my husband would like them. I was not sure what my kids would think. They had never even had a cabbage pocket before, so I didn't know what they would think of my new version. My four-year-old took a bite and said, "Mom, why haven't we had this food before?" My two-year-old ate hers up too...a rare thing for her to eat much of anything in the evenings.

Call them what you will: cabbage pockets, runzas, bierocks. I call them DELICIOUS!


***Cabbage Pockets

Makes 8-9 pockets, and enough filling to freeze for future use. If you want just enough filling for this recipe, cut filling recipe in half.

Preheat oven to 350 degrees.

1 1/2 cups brown rice flour
1 1/2 cups tapioca flour
3-4 Tbsp. dry powdered milk, or dry dairy-free milk powder 
1/2 tsp. salt
1 tsp. xanthan gum
4 1/2 tsp. active dry yeast, or two packages yeast
1 tsp. honey (or 2 tsp. sugar)
1 Tbsp. oil
3 tsp. cider vinegar
1 cup warm water
Extra tapioca flour for rolling out dough

1 Tbsp. melted butter, for brushing tops of pockets

Filling:
2 pounds ground beef
1 head cabbage, chopped
1/2 onion, chopped
Salt and pepper as desired

In large pot, brown ground beef. Drain off fat. Add cabbage, onion and desired salt and pepper. Cover with lid and cook until onions and cabbage are tender. Stir occasionally.

While beef-cabbage mixture is cooking, mix dry ingredients for dough in large mixing bowl. Add honey, vinegar, oil and water. Mix until soft dough forms. Divide dough into 8-9 pieces. On clean surface lightly floured with tapioca starch, roll dough into squares about 1/4 inch thick. In center of dough, spoon on some of the beef-cabbage mixture. Do not over-fill as this causes the dough to break. (Darn fragile GF dough!). Fold dough over mixture and fold ends underneath (see picture above to give you an idea of what they should look like). Brush melted butter over the tops of the cabbage pockets to help them brown in the oven.

Bake 15-20 minutes on greased baking sheet or non-stick baking sheet, or until dough begins to brown slightly (it will be very light brown). For a true test of "doneness," check out the bottom of the cabbage pocket. It should be nice and golden brown.

Enjoy!

Saturday, October 15, 2011

Digging for Bones Snack Cups

Perhaps you have a child that is a dinosaur lover and dreams of being a paleontologist. Or maybe you are hoping to make a gluten-free Halloween treat that everyone will love. Either way, this recipe will be a hit at your house - and with anyone who gets to try one of these snack cups!

The most time consuming part of the process is baking time for the little meringue "bones." They bake for about an hour and half at a low oven temperature, but I figure that gives me quite a bit of time to clean up the kitchen, or do something fun with the kids while waiting.

First, you mix up all the ingredients for the meringue bones, scoop the mixture into a large ziploc bag and snip off one corner. Pipe some bone shapes onto two cookie sheets that are covered with parchment paper. Bake for about 1.5 hours. When they are done, they will no longer be squishy to the touch and they will have begun browning slightly. They will look kinda like these: (Yeah, I know they don't look anything like actual bones!)


Allow the "bones" to cool, and then break each "bone" into 2-3 pieces. Crush up Honey Nut Chex (I used most of the box). In small, clear cups layer crushed cereal, chocolate chips (or desired GF chocolatey candy), and "bones." Repeat layers one more time. This should make about 10 small snack cups.


***Digging for Bones Snack Cups
3 egg whites
1/4 tsp. cream of tartar
1/2 cup sugar
Pinch of salt
Honey Nut Chex cereal
Chocolate chips (or other desired GF chocolate candies)

Supplies: parchment paper, ziploc bag, clean scissors, small plastic cups (I like clear best)

Cover two cookie sheets with parchment paper. Heat oven to 225 degrees. In large bowl, beat egg whites with electric mixer on high until foamy. Add in cream of tartar and salt. Continue beating until the egg mixture forms small peaks that are not dry. Add sugar and beat until the mixture appears shiny. Spoon beaten egg mixture into large ziploc bag. Seal ziploc bag and snip one corner with scissors. Pipe bone shapes onto prepared baking sheets. Bake "bones" for 1.5 hours, and rotate baking sheets halfway through bake time. "Bones" are done when they are no longer soft to the touch and have begun to brown. Cool completely. Break each "bone" into 2-3 pieces.

Crush Honey Nut Chex. (I used almost a whole box) In small, clear plastic cups, layer crushed cereal, chocolate chips, and "bones." Repeat layers. Makes about 10 snack cups.

My kids had lots of fun with these cups. My oldest pretended he was digging for dinosaur bones and we had to identify what kind of dinosaur each bone came from. Hope you enjoy!

Friday, October 14, 2011

Gluten-Free Calzones!

I apologize for being terrible about blogging as of late. I've gotten sucked into crocheting amigurumi figures for some friends and family, and while I have many recipes to share, I have forgotten to post them here! I've got some catching up to do!

In the next few days I plan to share two Halloween-theme treats that you and your kids (if you don't have kids, you'll still enjoy these!) will enjoy. In fact, I think these two recipes are so fun and delicious that people who aren't restricted to gluten-free eating will enjoy these too. Stay tuned. :)

Shortly after I started eating gluten free, I found a pizza crust I absolutely love! It is in the book 125 Best Gluten-Free Recipes by Donna Washburn and Heather Butt. I totally love that recipe, and my extended family does too. They don't have to eat gluten-free, but they love it when I make my pizza. The *only* thing I don't like about it is that you can't knead it and use it for calzones.

I didn't realize how much I had missed calzones until I made this recipe. It filled a void in my taste memory. I hope you will feel the same way after trying these out for yourself!

I had forgotten how wonderful it felt to knead dough. Floury hands, dough between my fingers. Perfection.


***Gluten-Free Calzones
3/4 cup brown rice flour
3/4 cup tapioca starch, plus extra for rolling dough
2-3 Tbsp. dry milk powder, or dairy-free powder (I think unflavored gelatin may work here too)
1 tsp. salt
1 tsp. xanthan gum
2 1/4 tsp. active dry yeast (or 1 packet)
1 tsp. honey
2 tsp. oil, plus 1 tsp. of oil
1 tsp. cider vinegar
1/2 cup warm water (water that is too hot will kill the yeast)
Cornmeal, for sprinkling over baking sheet
1 egg, or oil for brushing across tops of calzones
Pizza sauce, mozzarella cheese, desired pizza toppings, salt, pepper, and Italian seasoning

Preheat oven to 400 degrees. Dissolve yeast into warm water. Add honey and allow yeast mixture to sit for 5 minutes. In medium-size mixing bowl, combine brown rice flour, tapioca starch, dry milk powder, salt and xanthan gum. Stir to combine. Add oil and vinegar to dry ingredients. Slowly stir in yeast mixture. Knead until dough forms into a ball. Put 1 tsp. oil in bowl and turn dough until it is coated with oil.  Allow dough to rest uncovered for 20 minutes.

Break dough into four equal pieces. On a clean surface dusted with tapioca starch, roll out each piece until it is about 1/4 inch thick. Fill each calzone with pizza sauce, cheese, desired toppings, and a dash of salt, pepper, and Italian seasoning. Be careful not to overfill. Overfilling will cause the dough to break. Fold top of dough over filling and pinch top and bottom together all the way around. If necessary, use a spatula to loosen dough from work surface. Place on cookie sheet that has been lightly dusted with corn meal. Repeat with remaining pieces of dough. Beat 1 egg into 1 Tbsp. water. Lightly brush the tops of calzones with egg mixture (or, you can brush tops with oil instead).

Bake calzones for 18-25 minutes, or until tops begin to turn golden brown, and are no longer soggy to the touch.

Enjoy! Be careful - contents of the calzones will be VERY hot when they are first removed from the oven.

Wednesday, October 5, 2011

Crispy Chicken Tenders

While I waited for my son to get out of preschool, I took my daughter to the library. They have an awesome children's department at this library, complete with puppet theater and educational computer games. My daughter loves the puppet theater and the assortment of board books, so many afternoons we find ourselves there in the children's department. On this particular day, I also noticed they had a display with a take-home recipe for anyone who was interested. I glanced over the recipe and thought it looked great and would be easy to make gluten-free. I tweaked it a bit and came up with Crispy Chicken Tenders.


***Crispy Chicken Tenders
1 1/2 tsp. vinegar, plus another 2 Tbsp. vinegar
1/2 cup milk
1 pound boneless, skinless chicken breast halves (I used two large halves)
2 Tbsp. prepared mustard
2 Tbsp. grape jelly
black pepper to taste
1 cup crushed Rice Chex cereal (I measured out 2 cups uncrushed, and then crushed them)

In 1/2 cup measuring cup, put 1 1/2 tsp. vinegar in and fill up with milk. Allow 10 minutes for mixture to thicken. This creates homemade buttermilk. Cut chicken breast halves into strips or nugget-size pieces. In a bowl, combine mustard, remaining 2 Tbsp. vinegar, jelly and desired amount of black pepper. Stir in homemade buttermilk. Add cut up chicken pieces, cover, and place in refrigerator 20 minutes.

Heat oven to 400 degrees. Crush cereal in bowl. Lightly grease a baking sheet. Remove cut chicken pieces from milk-mustard mixture one at a time and coat with crushed cereal. Place coated chicken pieces on prepared baking sheet. Repeat process until all chicken pieces are coated. Bake chicken 25 minutes, or until internal temperature reaches 170 degrees. Serve immediately.

You can use whatever dipping sauce you like. I made a zesty BBQ sauce to go with my chicken. My kids used ketchup.

Sunday, October 2, 2011

Grandma's Hamburger Soup

It's Fall! I don't know what your weather is like, but it is getting cooler here by the day. Evening comes much more quickly, and it is dark when I wake up in the morning. I am not ready for snow, but Fall is my favorite season. I love the crunch of leaves under my feet, sweater weather, and hot soup. It doesn't get much better than that.

One of my go-to soups is a recipe my Grandma made. When I was in college, I lost my Grandma to Parkinson's disease. I can't believe it has been so many years now. I miss her all the time, and making this soup brings back wonderful memories of time I got to spend at her house. I can still hear her whistling melodies in the kitchen, and I will never forget learning to roll out egg noodles on her pull-out cutting board. And so, here it is. I share it in the hopes that it will warm you the way it does me - both in body and in soul.


***Grandma's Hamburger Soup
2 pounds ground beef
46 ounces tomato juice
3-4 peeled potatoes, cubed
1 large package frozen mixed veggies
1 can green beans, drained (I do a small package of frozen green beans)
3 carrots, peeled and sliced
1 large onion, diced
2-3 celery stalks, sliced
1 tsp. marjoram
salt and pepper, as desired
parmesan cheese, if desired for topping

Brown ground beef in large pot and drain off fat. Add tomato juice, potatoes, mixed veggies, green beans, carrots, onion, celery and marjoram. Cook over medium to medium high heat without a lid (I will use a lid when I make this to prevent water from escaping) for at least an hour. Water may be added if soup gets too thick. Salt and pepper to taste. Top with parmesan, if desired.

We always had parmesan at the table growing up so that we could each add as much or little as we wanted. This thick soup doesn't really required the addition of fancy GF crackers and is naturally gluten-free. When we make this (for 2 adults and 2 small children) we always have leftovers for lunch the next day. Hope you enjoy this recipe!

Monday, September 26, 2011

Gluten-Free Meatballs

I'm baaaaaack! :)  New camera, memory card issues fixed, and new recipes! Unfortunately, 5-6 of the recipes I wanted to share with you were on the old memory card that is no longer with us, but I have the files retrieved. Just need to transfer them to this computer. Those recipes will be coming shortly.

My lovely husband saved a recipe for swedish meatballs from his 6th grade home ec. class because he loved it so much he wanted to make it again. His parents never made it, and he tried one time several years ago to make the recipe and the meatballs totally fell apart. About a week ago, my son started complaining that he had never eaten a real meatball with his spaghetti. I couldn't remember if *I* had ever had a real meatball with spaghetti, and if I had, I had certainly never made them myself. So, I pulled out my husband's recipe for swedish meatballs. I went ahead and followed the recipe for the most part, but if you'd like a more Italian zip for spaghetti, you could substitute some Italian seasoning for the ginger and nutmeg. Truthfully though, the spices in these meatballs are so subtle that I didn't notice them conflicting with my spaghetti sauce at all.


OK, so meatballs are hard to get a nice picture of. Ignore the "pear" napkins. We are trying to go mostly paper-free (no paper towels or disposie napkins), so these napkins were all I could find! One batch made about 36 meatballs. The picture below is how I served the meatballs. My kids like the noodles and sauce all mixed together. I served the meatballs over quinoa noodles with a side of green beans.


***Gluten-Free Meatballs
1 pound ground pork
1 pound ground beef
1 1/2 cups soft bread crumbs* (I used 3 slices of Rudi's original sandwich bread)
1 cup light cream
1/2 cup chopped onion
1 egg
Dried parsley flakes (a few shakes)
1/2 tsp. salt
dash black pepper
3 Tbsp. butter, divided

For Swedish Meatballs: dash of ginger, dash of nutmeg
For Italian Meatballs: dash of Italian seasoning

*To make soft bread crumbs, cut bread into small pieces and soak in light cream.

Cook chopped onion in 1 Tbsp. of the butter, until onions are tender but not browned. Set aside. Soak pieces of bread in light cream for 5 minutes. Scoop bread out of cream with a slotted spoon and place in large mixing bowl. Discard any unused cream. In bowl with soft bread crumbs, mix in meats, onion, egg, parsley, salt, pepper, and spices for either Swedish or Italian meatballs. Mix thoroughly. Form meat mixture into about 36 meatballs (each around the size of a walnut, or about 1 1/2 inches). Melt remaining 2 Tbsp. of butter in large skillet. Cook meatballs in butter, flipping to cook evenly. You want your meatballs to be over 165 degrees internal temperature.

I cooked the meatballs in with the butter until they reached around 160 internal temperature. Since I was working the meatballs in batches, I preheated my oven to 350 and when meatballs browned on all sides, I would place them on a cookie sheet and into the oven. By the time all the meatballs were finished and had spent some time in the oven, they were well done and much of the fat baked off. Drain on paper towels. We had quite a few meatballs leftover, so I froze them for our next spaghetti and meatballs night.

Enjoy! ~It's good to be back!

Thursday, September 15, 2011

When things aren't going your way

Sometimes you just have to go bananas.

Yes, I just quoted the Fresh Beat Band. I realize that makes me kinda pathetic. But, I embrace it. Why not?

So, tonight I had every intention of posting a recipe for my chicken stirfry with white sauce. I love this recipe because it is basic. You can turn it into most anything you want. It doesn't require soy sauce, so no expensive gluten free alternatives are necessary. I had planned to write a witty story about my first experience having a gluten-free Chinese meal at a restaurant and being surrounded by tables covered with fresh sugar snap peas, but it was not to be.

I took the digital memory card out of the computer and was going to try and take a picture when the memory card wouldn't stay in the camera. The camera continued to spit the card back out at me, and I was getting really frustrated. I decided the camera was broken. I would have to blog later.

I sat down later to blog and realized that the memory card was also broken. It was permanently locked, and I can no longer access any of my files. I finally got it unlocked, but am still unable to read the files on my computer. Camera, dead. Memory card, dead. Status of the scads of pictures and videos of my kids on the memory card, unknown.

Are you kidding me?!?!?!

My weekend looks to be an expensive one, and I'm hoping in the next few days I have a happy report that at least some of my picture and video files were recovered. Would you join me in hoping for that? I had many lovely food pictures to share with you, but those can be easily recreated. I'm hoping to save the pictures of my kids at my grandmother's 80th birthday party, my daughter's first haircut, and countless other things that simply cannot be recreated.

So, for now, I will be going bananas, and will also be hoping that when I go to sleep I will no longer have that Fresh Beat Band song stuck in my head. Hopefully my blog hiatus will not be a long one, and hopefully my next post will be more cheerful!

Monday, September 12, 2011

Carrot Muffins - my new favorite!


Yum! Carrot muffins are my new favorite muffin, and I'm thrilled to be able to share this recipe with you! For my readers who don't eat GF, just use 1 1/2 cups all-purpose flour as a substitution for the white and brown rice flours.

I think muffins are my favorite GF "bread" product to make. Because they form a natural crust as they bake, I've found that I can skip out on the xanthan gum most of the time with no problem. My kids love having muffins for breakfast, and usually they freeze well for breakfasts on the go.

***Carrot Muffins
2 cups grated carrots (right around 4 large carrots)
3/4 cup brown rice flour
3/4 cup white rice flour
3/4 cup brown sugar (I mixed 3/4 Tbsp. molasses into 3/4 cup white sugar)
1/2 cup applesauce (I use naturally unsweetened)
1 tsp. cinnamon
1/2 tsp. ground ginger
1/4 tsp. ground cloves
1/4 tsp. salt
1 tsp. baking soda
2 eggs

Preheat oven to 350. Lightly grease 12-count muffin tin. In large mixing bowl, combine flours, cinnamon, ginger, ground cloves, salt, baking soda, and brown sugar. Stir until well combined. Slowly stir in 2 cups grated carrots, eggs, and applesauce until batter forms. Divide mixture evenly between 12 muffin cups. Bake for 20-25 minutes. If necessary, slowly go around the muffins with a knife to loosen them from the muffin tin.